Creating a code type question
Create new question
- Go to Question list page and click Create New button
- Then you will be redirected to question creation page, where you will be able to see different question types to select from.
1. Single Select: Question with multiple options and only 1 correct answer.
2. Multi Select: Question with multiple options and 1 or more correct answers.
3. Output Question: Questions where user has to guess the output for the provided input.
4. Subjective Question: Questions requiring brief answers or addition of any type of attachment.
5. Coding Question: Questions that involve solving a coding problem.
6. Typing Question: Questions to test the typing efficiency of the candidate.
7. File Upload: Questions where user can upload one or more files as response.
8. Grammar: Questions where to check grammar proficiency. - Select Coding Question type to create a coding question.
Question Content
- First of all, you can enter a title for your question. Title is not a required field. It is auto-generated from the content of the question if left empty.
- After adding question title you can start on adding content to your question.
- Using the add icon button we can add various types of content to our question as mentioned below.
- Text:- This options helps us add normal text to the question
- Code:- This options helps us add any code content to the question
- Image:- This options helps us add image to the question from our system storage
- Audio:- This option helps us add any audio url to the question
- Video:- This option helps us add any video url to the question
- Paste as Image:- This option helps us paste any copied image to the question from the clipboard
- Next button:- Using this button we can save the question content and then move to the next steps
- Using the three dot icon button on the right side of each input field we can manage the order of question content or delete the content.
- Using the arrow up icon button we can shift that content up by one block.
- Using the cross icon button we can remove that content block.
- Using the arrow down icon button we can shift that content up by one block.
Solutions 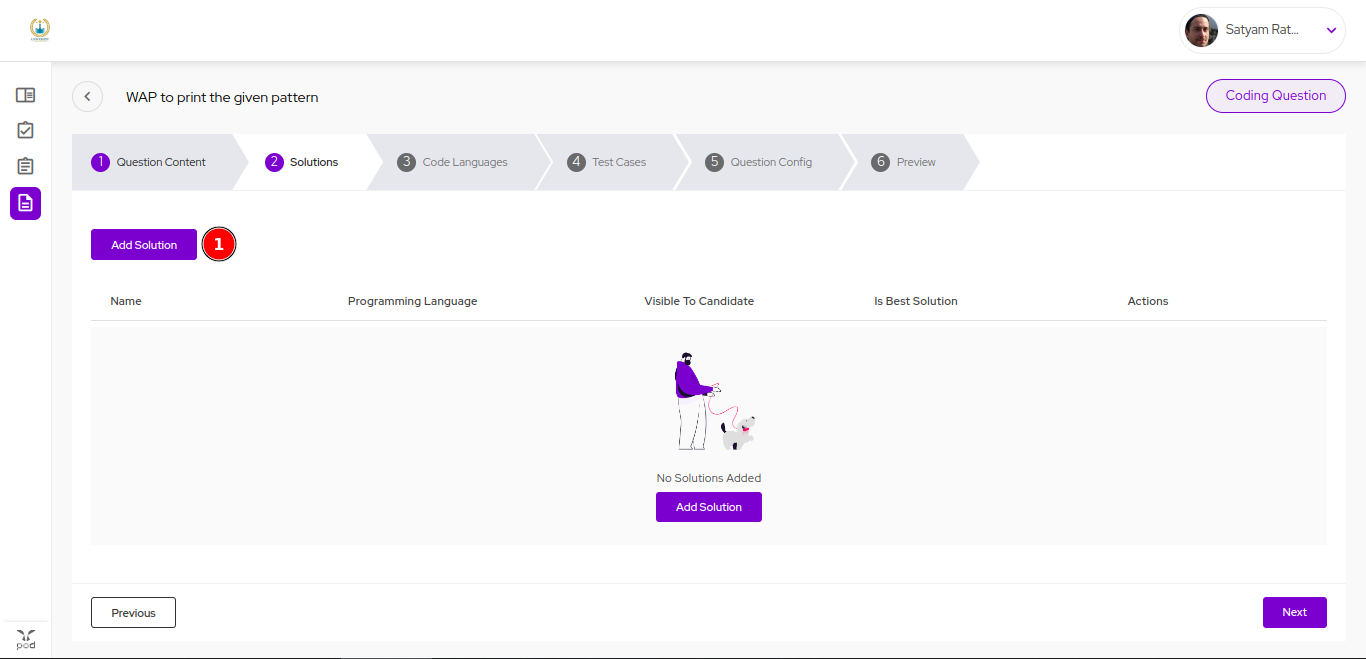
- Using the Add Solution button we can add a new solution to the question. It is optional step but really helpful in validating test cases. On clicking this button you will be able to see a pop up where you can fill details related to the solution you want to add.
- Solution Name:- You can specify the name you want to give to your solution. It is a required field.
- Language:- This dropdown menu will help you select the language for your solution among various programming languages options. This is also a required field.
- Solution Description:- You can add description for your solution.
- Solution:- You can enter the solution written in the selected language here.
- Save:- This button helps us to save the solution to the question.
- Visible to Candidate:- If we want the solution to be visible to the candidate while viewing the results we can check this checkbox or leave it unchecked if we don't want the solution to be visible to the candidate.
- Is Best solution:- We can select the best solution among all the added solutions using this radio button. By default this option is checked if only one solution is added.
- Using the eye-icon button we can view the solution.
- Using the play-icon button we can execute a solution against the testcases added to the question. This button will remain disabled if no testcases are present.
- Using the edit-icon button we can edit a solution.
- Using the delete-icon button we can delete a solution.
- Previous:- This button helps us to go back to previous step.
- Next:- This button helps us to save the question.is button helps us to go to the next step.
Code Languages
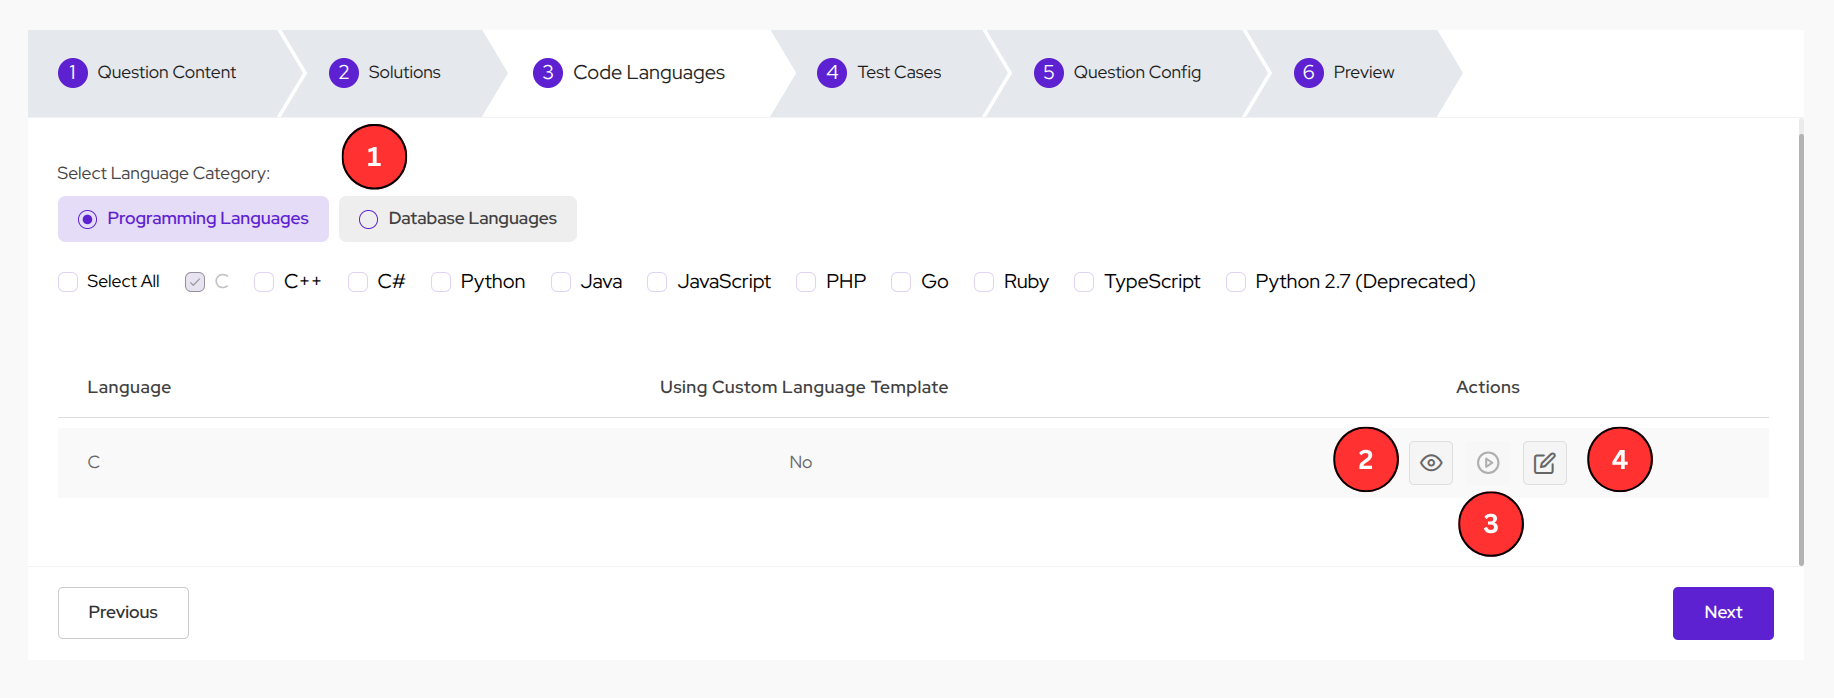
- Select Languages:- We can select from listed programming or database languages (at least one language should be selected among them). Candidate will be able to code in any of the selected languages. By default C language is selected. All languages have a default template which candidates are able to see while attempting the question. We can always edit default language templates as per our need.
- Using the eye-icon button we can preview the language template that will be visible to the user while giving the assessment.
- Using the play-icon button we can run the language template against the testcases added to the question. This button remains disabled if no testcases are present.
- Using the edit-icon button we can edit a language's template.
- Pre-Code Area:- Candidates are NOT able to edit this part of the template.Add applicable imports, class and data structure declarations here.
- Stub area:- Candidates are able to edit this part of the template.Add the code / function that candidate should work on here.
- Post-Code Area:- Candidates are NOT able to edit this part of the template.Add the driver code, main function here.
- Save:- Click on the save button to save the language template.
Test Cases
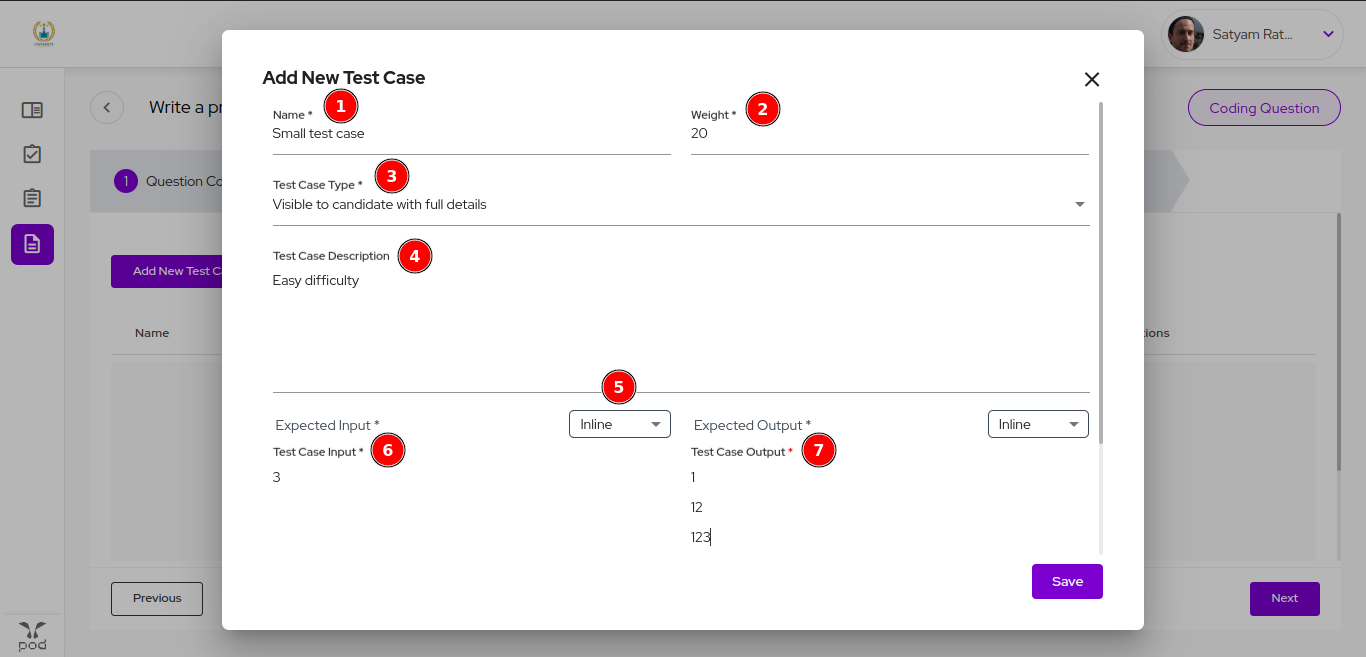
- Name:- Title of the test case. This is a required field.
- Weight:- We can assign weightage to the test case according to the complexity of the test case. This is a required field.
- Test Case Type:- This dropdown menu helps us to set or limit the visibility of the test case.
We can choose between the following options-
- Visible to candidate with full details:- Test case will be visible to the candidate with full details when he executes his solution while giving the assessment.- Partially visible to candidate (only pass/fail):- Only the Test case result, i.e., pass/fail will be visible to the candidate when he executes his solution while giving the assessment.- Not Visible:- Test case will not be visible to the candidate when he executes his solution while giving the assessment. - Test Case Description:- We can add description to the test case.
- Inline/Upload:- This dropdown menu gives us the ability to either enter inline testcase's input/output text or upload a text file if the input/output text is too long.
- Test Case Input:- Test case input text. Any solution which is run against this testcase will consider this text as an input. This is a required field.
- Test Case Output:- Test case output text. Any solution which is run against this testcase will compare it's output with this output text in order to decide whether the testcase is passed or failed. This is a required field.
- Upload Test Case:- Click this button to upload a text file from your system storage.
- Using this cross-icon button we can remove the added text file.
- Generate Output:- Click this button to generate the output corresponding to the given input. Best solution is executed against the given input to get the output.
- Save:- Click this button to save the test case.
- Validate Testcases:- Click here to validate all testcases against the best solution added to the question.
Question Config
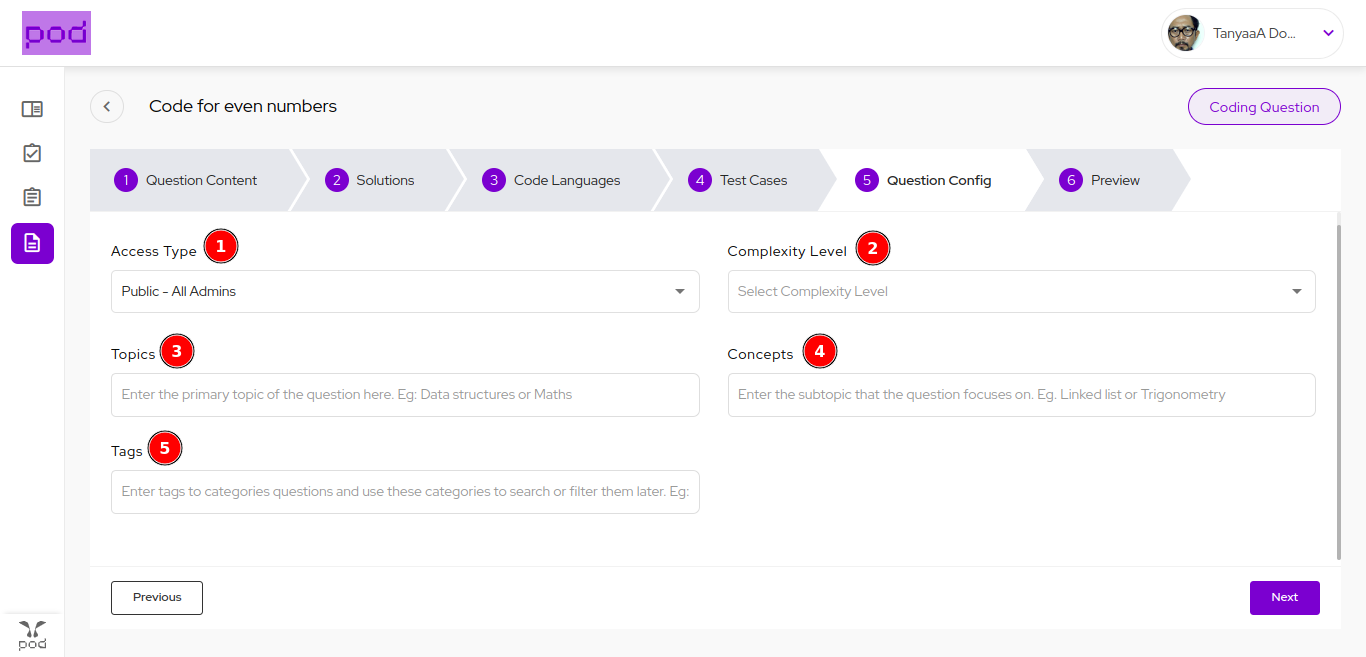
- Access Type:- This dropdown menu helps us limit the access of the question we are creating. This is a required field and by default access is provided to Public - All Admins
- Private - Collaborators Only
- Public - All Admins
- Complexity Level:- This dropdown menu helps us select the complexity level of the question. This is an optional field.
- Topics:- This input field helps us to create tags of the topics covered in the question. This is an optional field.
- Concepts:- This input field helps us to create tags of the concepts covered in the question. This is an optional field.
- Tags:- This input field helps us to create general tags for the question. This is an optional field.
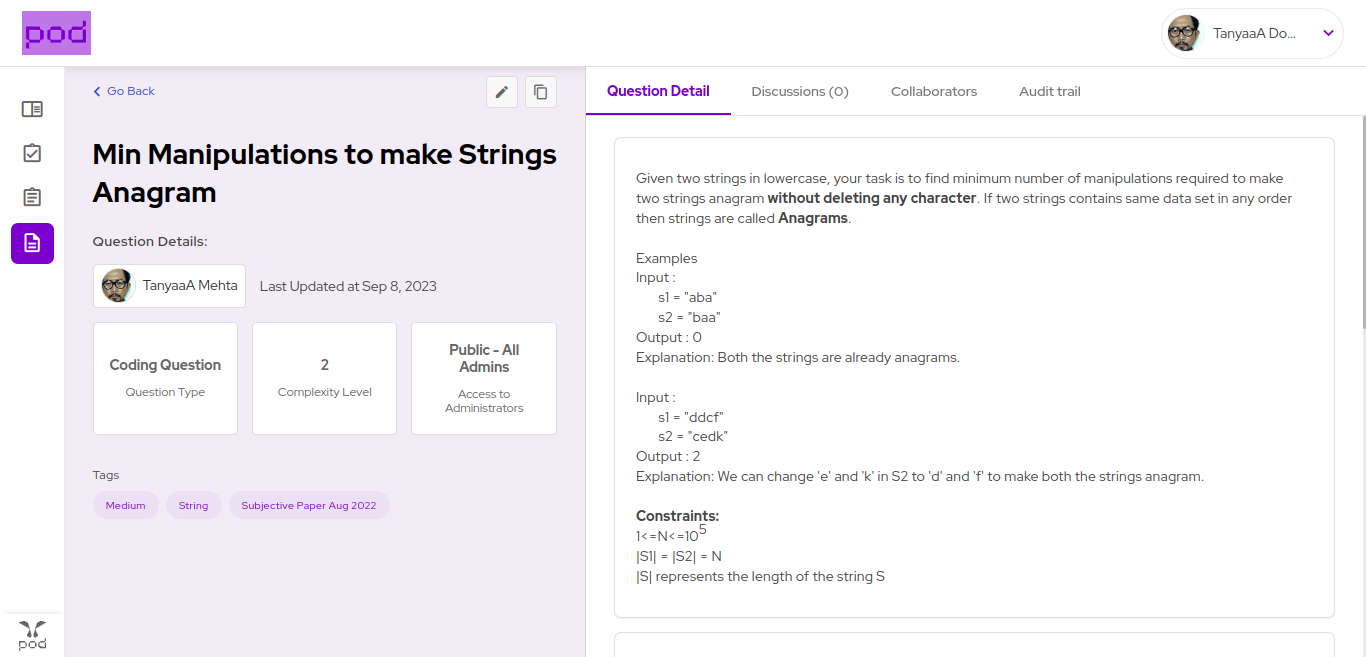
Preview 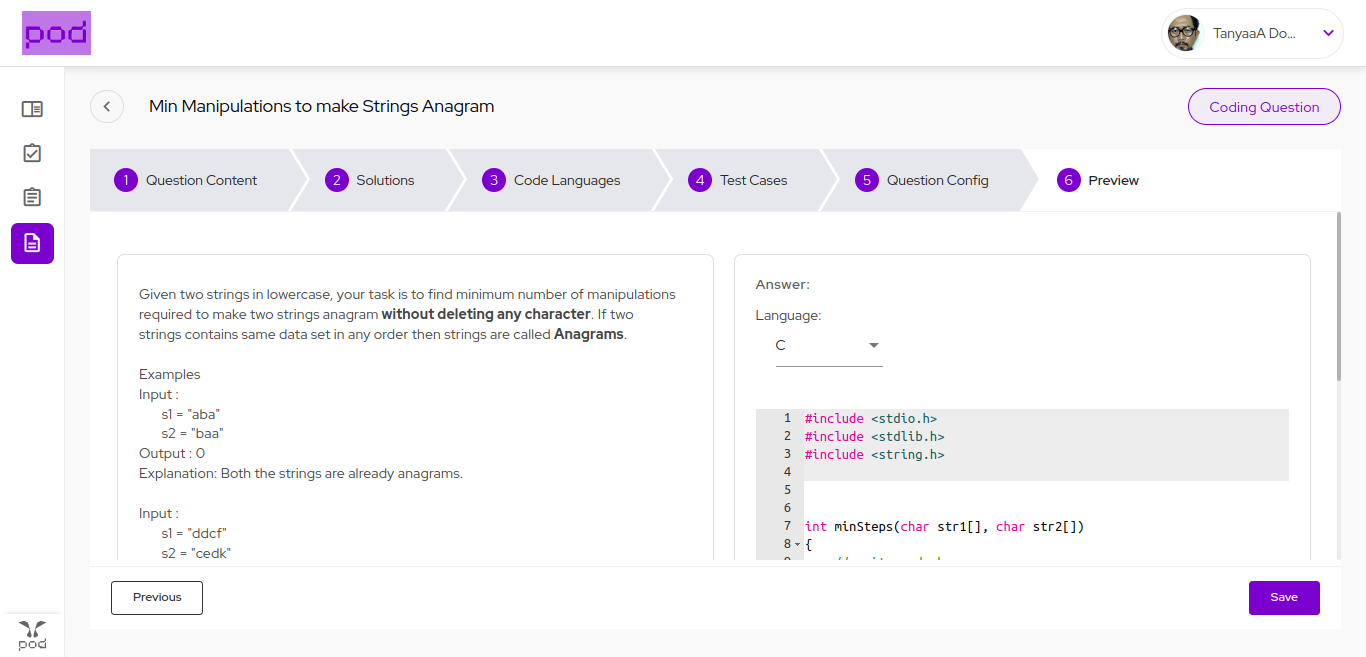
You can now finally have a look and feel of the question in the preview step. After reviewing the question you can click on the Save button to save the question and redirect to question-details page:-.
Related Articles
Creating a SQL Question In Code Type Question
Create new question Go to Question list page and click Create New button Then you will be redirected to question creation page, where you will be able to see different question types to select from. Select Coding Question type to create a coding ...Coding Question Time and Memory Specifications
Code Runner Time and Memory Specifications Language Version Exec Time Limit (secs) Memory limit (MB) Bash Bash 5.0 30 512 C GCC 9.2.0, C11 standard 30 512 C++ GCC 9.2.0, C++11 standard 30 512 C# Mono 6.6.0.161 30 512 Go Go 1.13.5 30 512 Java OpenJDK ...List of URLs to Whitelist in Firewall
This following URLs should be allowed to pass through your firewall, these URLs are necessary for Pod to work properly: pod.ai pod-cdn.com api.pod.ai blogs.pod.ai cms.pod.ai deeplink.pod.ai event-api.pod.ai help.pod.ai notifications-api.pod.ai ...